ZYLIA - 3D AUDIO RECORDING & POST-PROCESSING
  • ZYLIA Home
  • Blog
  • Shop

Using ZYLIA Studio PRO with ReWire

1/16/2018

2 Comments

 
by Maciej Lenartowicz

Integrating new tools into existing work-flows may be a difficult task, especially when those tools introduce innovative features, such as “virtual microphones” in ZYLIA Studio PRO. 
One of ZYLIA Studio PRO requirements is support for multichannel input for the plugin, which not many DAWs offer. Fortunately, there are ways to combine best of both worlds, and use ZYLIA’s technology with a typical multitrack workflow designed for dedicated microphone recording.
​
Such connection can be achieved thanks to ReWire, which is a software protocol allowing applications to exchange control messages and audio data. ReWire works both on macOS and Windows and requires no prior installation or configuration. Find out more at Wikipedia or Propellerhead website.
"Virtual Microphone" is a spatial audio filtering technique based on advanced beam-forming and sound source separation algorithms. It is defined and created by the ZYLIA software which takes into account both phase and amplitude differences between signals captured by the 19 capsules of the ZM-1. Virtual Microphones can have different spatial characteristics, width or shape depending on recording use cases and user needs. Each can be used as a single spot microphone with super-narrow directivity response, or can be combined with other into a variety of multi‑channel surround recording sets. This technology gives musicians and sound engineers a very flexible recording toolbox which can be used in post‑production phase. Additionally, advanced DSP algorithms allow to reduce room echo or to increase the performance of sound source separation.
More in a ZYLIA white paper.

​This article will guide you through the process of setting up a connection between ZYLIA Studio PRO (running within REAPER) and your DAW of choice (assuming it supports ReWire protocol).
  1. Make sure to run your main DAW in the first place. In case of this tutorial, we will use Ableton Live. It will act as a ReWire master (mixer).
  2. When your DAW is up and running go to its audio settings. Select a proper device, sample rate, and buffer size. Keep in mind that ZS PRO will work only with a sample rate of 48 kHz.
  3. Start REAPER, which will be a host to ZS PRO plugin and act as a ReWire slave (device). If it is configured correctly, you should see “ReWire Slave Audio” in the upper right corner of REAPER window.
    If you don’t see this it means that REAPER is not running as a ReWire slave. To fix this, go to “Edit” menu and select “Preferences”. In the list on the left find “Plug-ins” section and select “ReWire/DX”.  Enable “Check for ReWire mixer/device on startup” option and restart REAPER.
Picture
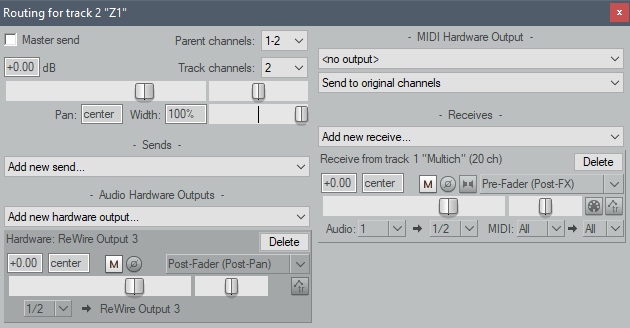
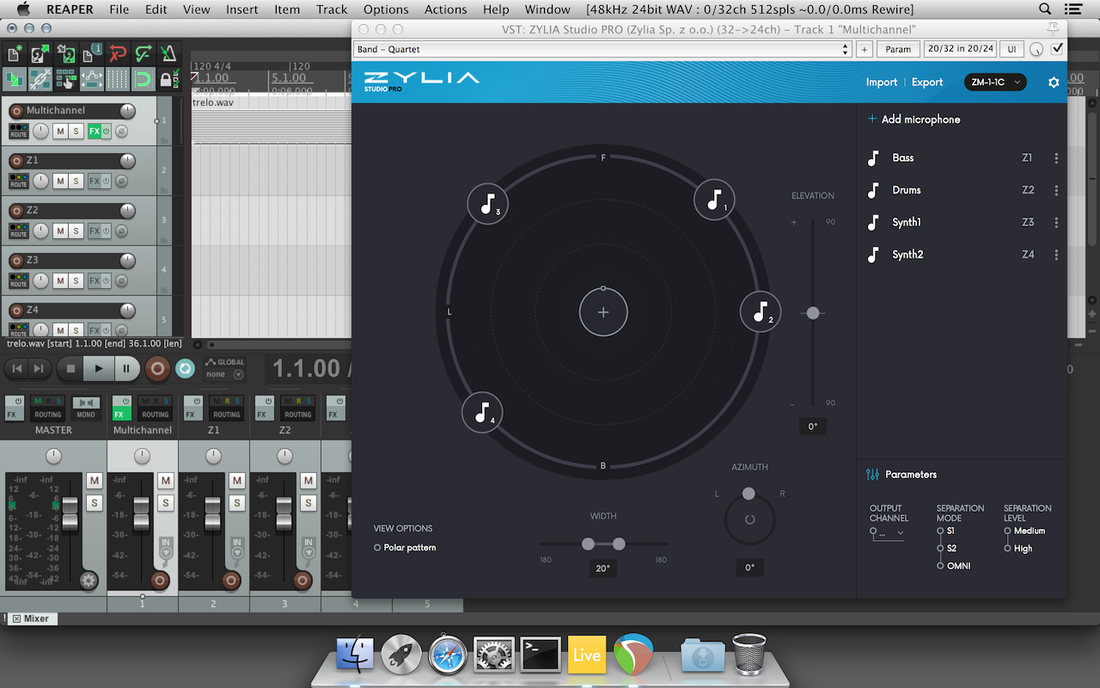
Example session in REAPER with ZYLIA Studio PRO. Notice that REAPER runs in ReWire mode.
4. Now you can create a new project in REAPER or load existing one. Use ZYLIA Studio PRO as you would otherwise, i.e. create a new track for every virtual microphone, with just one exception – these new tracks won’t be sent to master track. To do so, enter “Routing” menu for a track in REAPER and disable “Master send” option.

​To route audio form virtual microphone out of REAPER, you need to select “hardware” output for a track. These are the very same channels that will be available in Ableton. Click on “Add new hardware output...” menu and select one of the outputs from the list. It is advised to start from “ReWire Output 3” (for Z1 virtual microphone) since first and second outputs are usually associated with a master track
Picture
5. Go back to Ableton and create a new track. You will need “In/Out Section” of the mixer visible – if it’s not, use round “IO” button just right to the master track to turn it on. In “Audio From” section select “REAPER” as an input device, then select “REAPER Output 3” as an input channel. When you press “play” in one of the applications the signal from REAPER (processed by ZYLIA Studio PRO) should appear in Ableton. Set “Monitor” option to “In” to hear the sound produced by REAPER. The signal from virtual microphone now may be recorded and processed in the same way as it would be from a normal microphone connected to your audio interface.
Picture
Picture
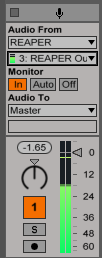
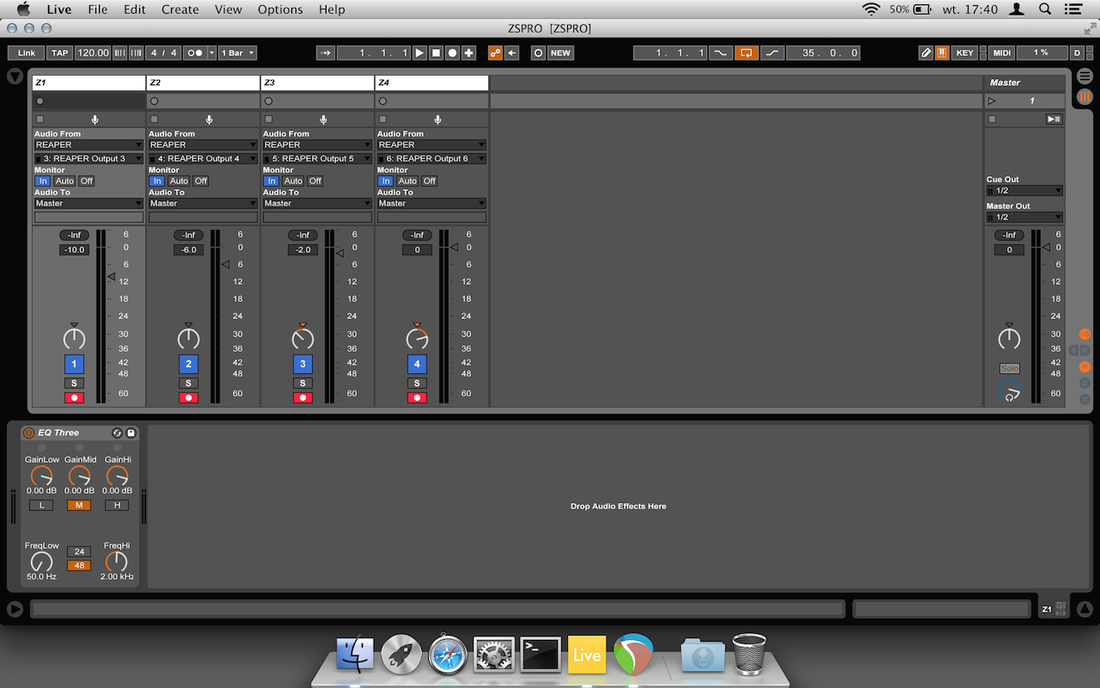
Ableton session set to receive audio from REAPER.
2 Comments
Gene Torres
10/28/2019 19:48:46

Can you do a rewire diagram with Reaper and Reason's?

Reply
codybecth link
6/1/2022 15:41:29

Great Article! Thank you for sharing this is a very informative post, and looking forward to the latest one

Reply


Leave a Reply.

    Picture

    Categories

    All
    360 Recording
    6DOF
    Ambisonics
    Good Reading
    How To Posts
    Impulse Response
    Interviews
    Live Stream
    Product Review
    Recording
    Software Releases
    Tutorials

    Archives

    August 2023
    July 2023
    June 2023
    May 2023
    February 2023
    November 2022
    October 2022
    July 2022
    May 2022
    February 2022
    January 2022
    August 2021
    July 2021
    May 2021
    April 2021
    March 2021
    January 2021
    December 2020
    November 2020
    October 2020
    September 2020
    August 2020
    July 2020
    June 2020
    April 2020
    March 2020
    February 2020
    January 2020
    December 2019
    November 2019
    October 2019
    September 2019
    August 2019
    July 2019
    June 2019
    May 2019
    April 2019
    March 2019
    January 2019
    December 2018
    October 2018
    September 2018
    June 2018
    May 2018
    April 2018
    March 2018
    February 2018
    January 2018
    December 2017
    October 2017
    September 2017
    August 2017
    July 2017
    June 2017
    May 2017
    March 2017
    February 2017
    January 2017
    December 2016
    November 2016
    October 2016

    RSS Feed

Picture

Connect with us

Terms & Conditions   |   Refund Policy   |   Privacy Policy 
© Zylia Sp. z o.o., copyright 2018. ALL RIGHTS RESERVED. 
  • ZYLIA Home
  • Blog
  • Shop