|
In this tutorial we describe the process of converting 360 video and 3rd order Ambisonics to 2D video with binaural audio with linked rotation parameters. This allows us to prepare a standard 2D video while keeping the focus on the action from the video and audio perspective. It also allows us to control the video and audio rotation in real time using a single controller. Reaper DAW was used to create automated rotation of 360 audio and video. Audio recorded with ZYLIA ZM-1 microphone array. Below you will find our video and text tutorial which demonstrate the setup process. Thank you Red Bull Media House for providing us with the Ambisonics audio and 360 video for this project. Ambisonics audio and 360 video is Copyrighted by Red Bull Media House Chief Innovation Office and Projekt Spielberg, contact: cino (@) redbull.com Created by Zylia Inc. / sp. z o.o. https://www.zylia.co Requirements for this tutorial:
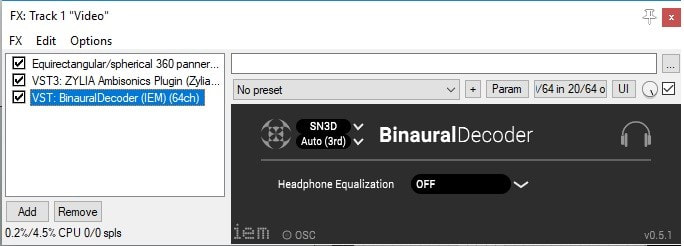
We will use Reaper as a DAW and video editor, as it supports video and multichannel audio from the ZM-1 microphone. Before recording the 360 video with the ZM-1 microphone make sure to have the front of the camera pointing the same direction as the front of the ZM-1 (red dot on the equator represents the front of the ZM-1 microphone) , this is to prevent future problems and to know in which direction to rotate the audio and video. Step 1 - Add your 360 video to a Reaper session. The video file format may be .mov .mp4 .avi or other. From our experience we recommend to work on a compressed version of the video and replace this media file later for rendering (step 14). To open the Video window click on View – VIDEO or press Control + Shift + V to show the video. 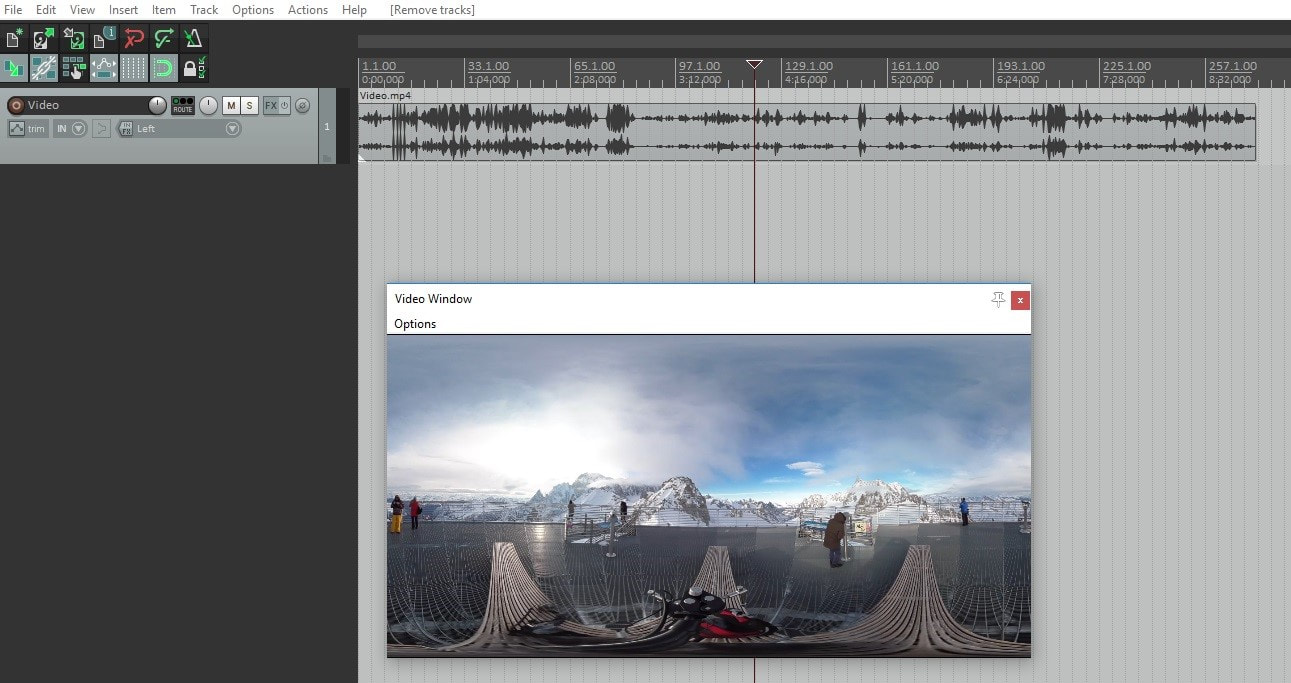 Step 2 - Add the multichannel track recorded with the ZM-1 and sync the Video with the ZM-1 Audio track. Import the 19 channel file from your ZM-1 and sync it with the video file. 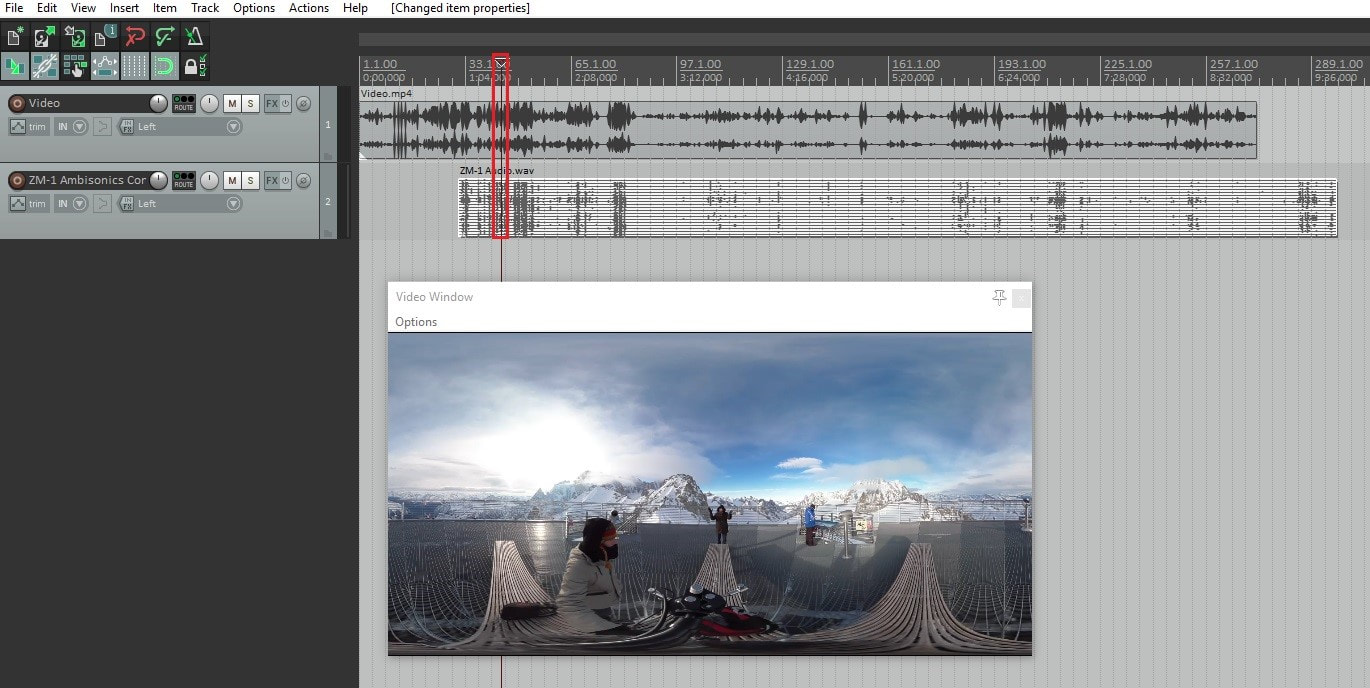 Step 3 – Disable or lower the volume of the Audio track from the video file. Since we will not use the audio from the video track, we require to remove or put the volume from the audio track at minimum value. To do so, right click on the Video track – Item properties – move the volume slider to the minimum. 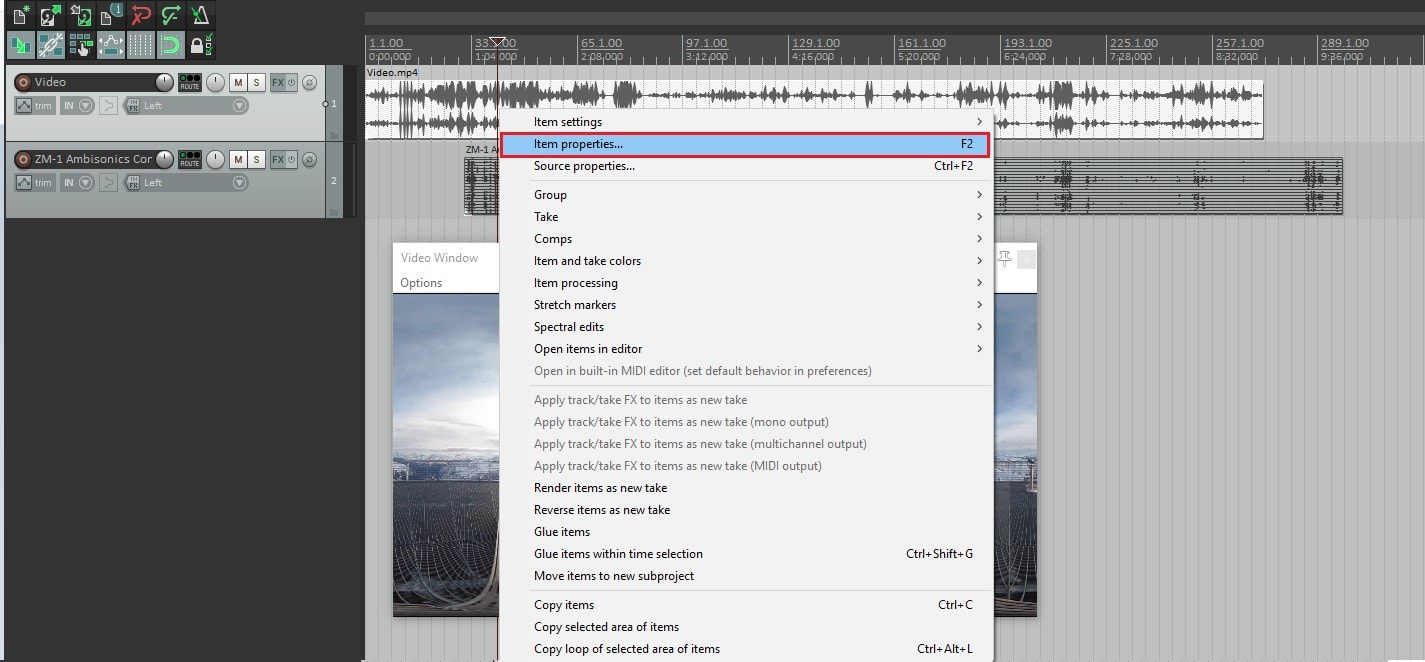 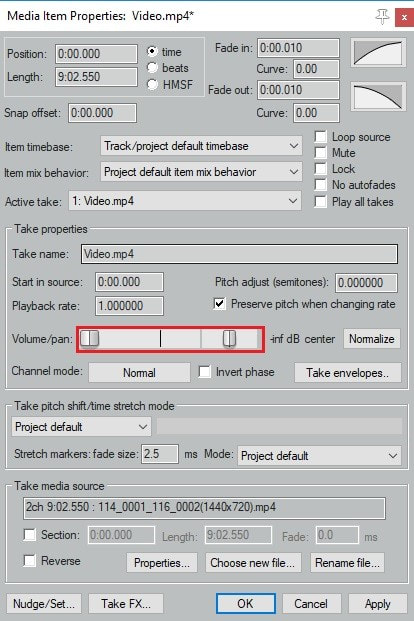 Step 4 – Merge video and audio on the same track. Select both the video and audio track and right click – Take – implode items across tracks into takes This will merge video and audio to the same track but as different takes. 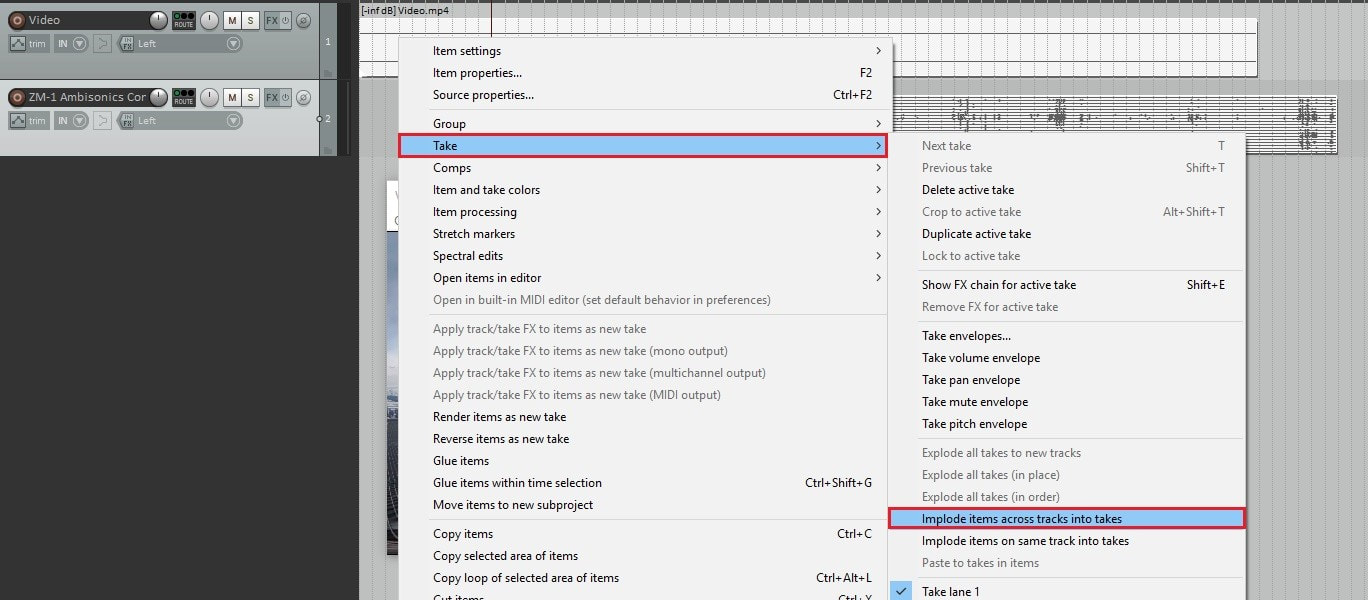 Step 5 – Show both takes. To show both takes, click on Options – Show all takes in lanes (when room) or press Ctrl + L 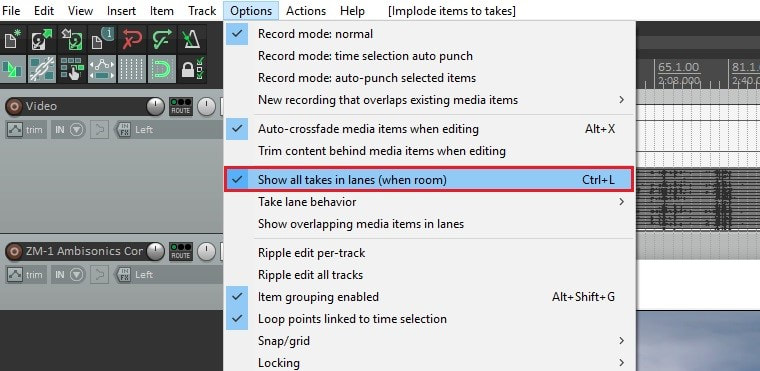 Step 6 – Change the number of channels to 20. Click on the Route button and change the number of track channels from 2 to 20, this is required to utilize the 19 multichannel of the ZM-1. 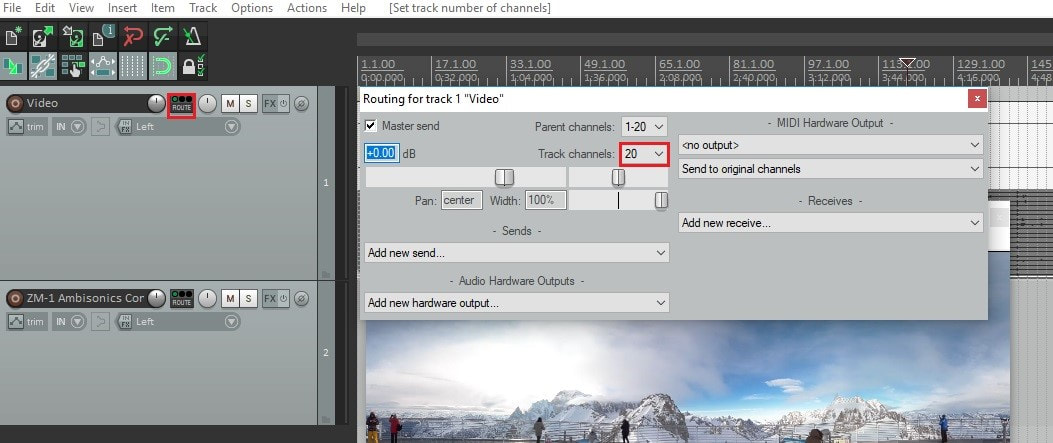 Step 7 - Play both takes simultaneously. If we press play right now, it will only play the selected take, therefore we need to be able to play both takes simultaneously, therefore: Right click on the track – Item settings – Play all takes. 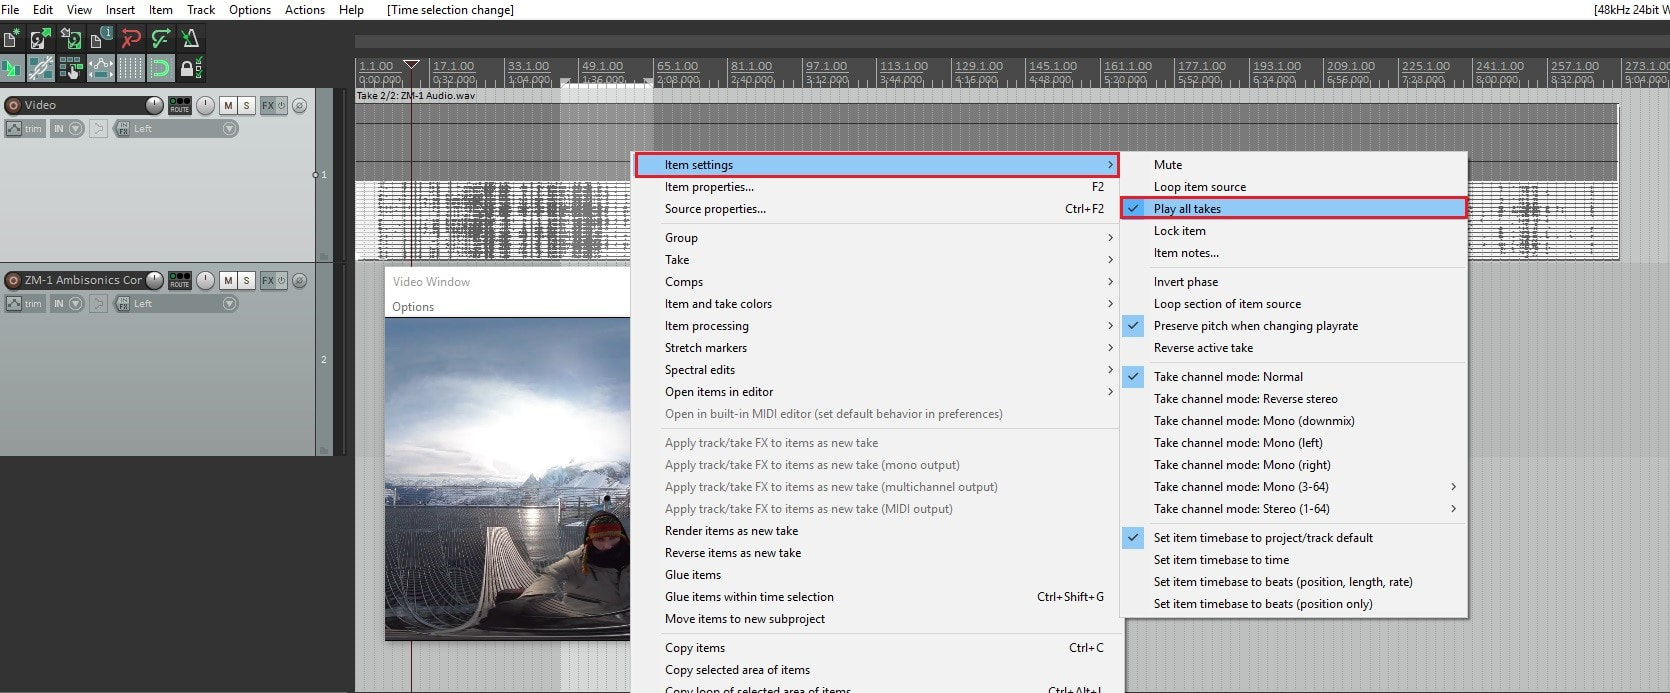 Step 8 – Change 360 video to standard video. Next we will need to convert the 360 video to equirectangular video to visualize and control the rotation of the camera. To do so, open the FX window on our main track and search for Video processor. 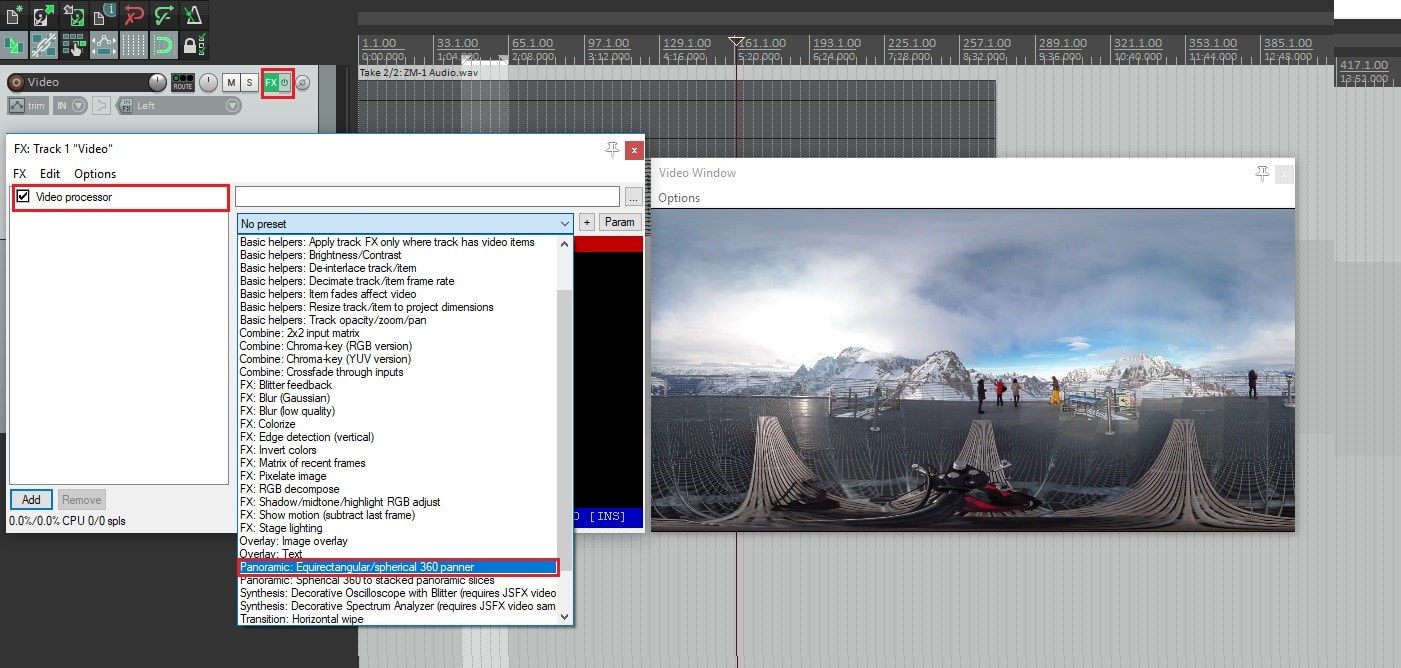 On the preset selection, choose Equirectangular/spherical 360 panner, this will flatten your 360 video allowing you to control the camera parameters such as field of view, yaw, pitch and roll. 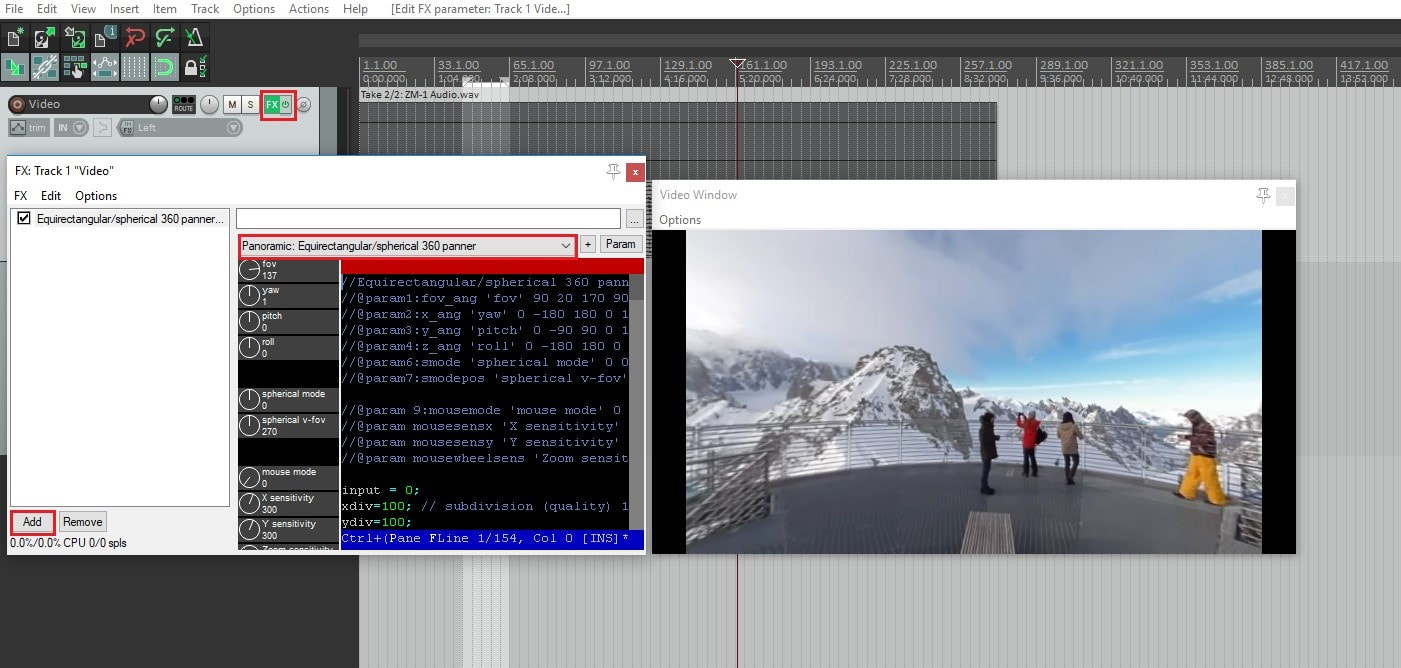 Step 9 – As FX, add ZYLIA Ambisonics Converter plugin and IEM binaural Converter. On the FX window add as well:
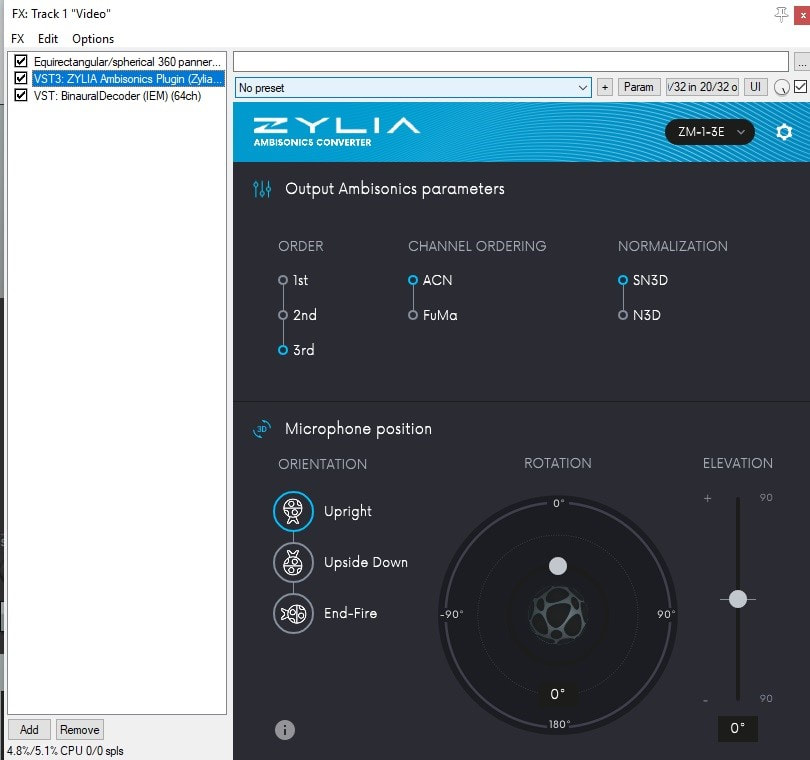  You should now have the binaural audio which you can test by changing the rotation and elevation parameters in ZYLIA Ambisonics Converter plugin. Step 10 – Link the rotation of both audio and video. The next steps will be dedicated to linking the Rotation of the ZYLIA Ambisonics Converter and the YAW parameter from the Video Processor. On the main track, click on the Track Envelopes/Automation button and enable the UI for the YAW (in Equirectangular/spherical 360 panner) and Rotation (in ZYLIA Ambisonics Converter plugin). 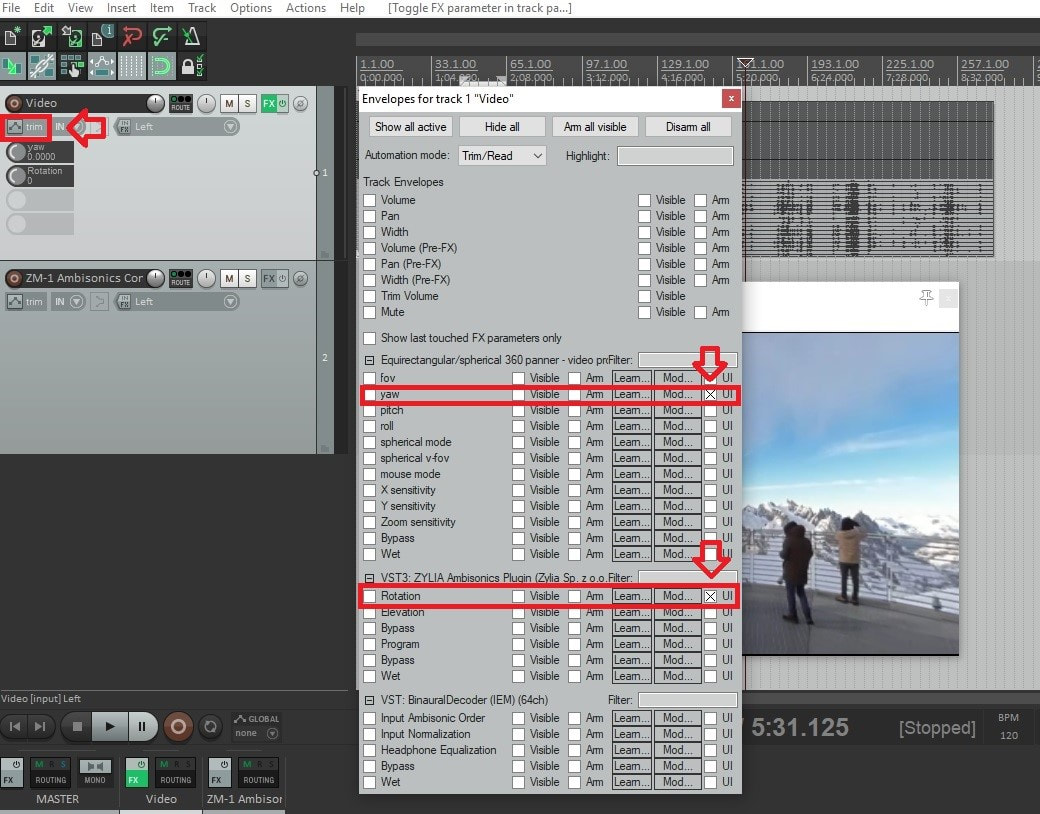 Step 11 – Control Video yaw with the ZYLIA Ambisonics Converter plugin. On the same window, on the YAW parameters click on Mod… (Parameter Modulation/Link for YAW) and check the box Link from MIDI or FX parameter. Select ZYLIA Ambisonics plugin: Rotation 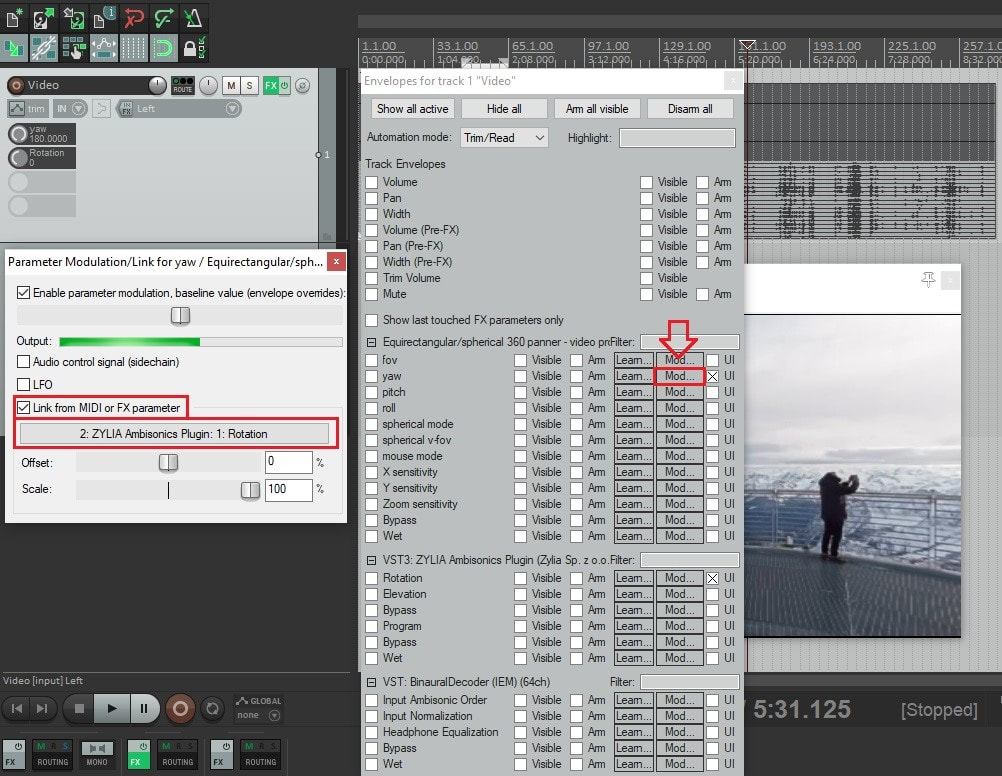 Step 12 – Align the position of the audio and video using the Offset control. On the Parameter Modulation window you are able to fine-tune the rotation of the audio with the video. Here we changed the ZYLIA Ambisonics plugin Rotation Offset to -50 % to allow the front of the video match the front of the ZM-1 microphone. 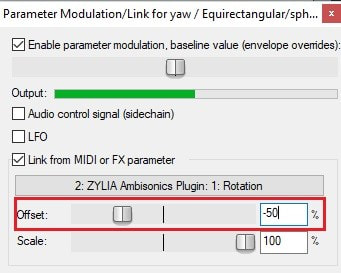 Step 13 – Change the Envelope mode to Write. To record the automation of this rotation effect, right-click on the Rotation parameter and select Envelope to make the envelope visible. 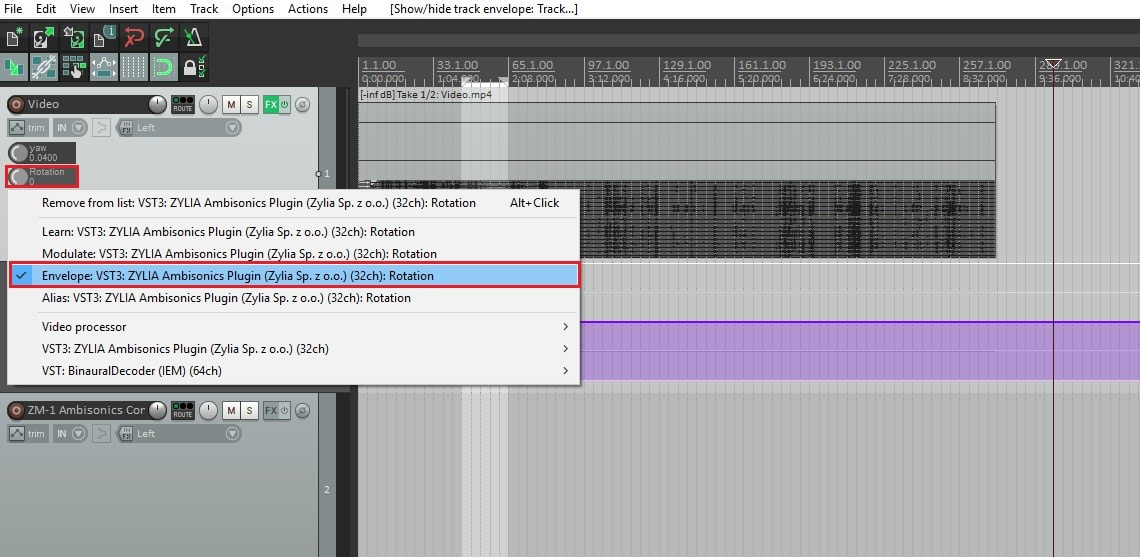 After, on the Rotation Envelope Arm button (green button), right click and change the mode to write. 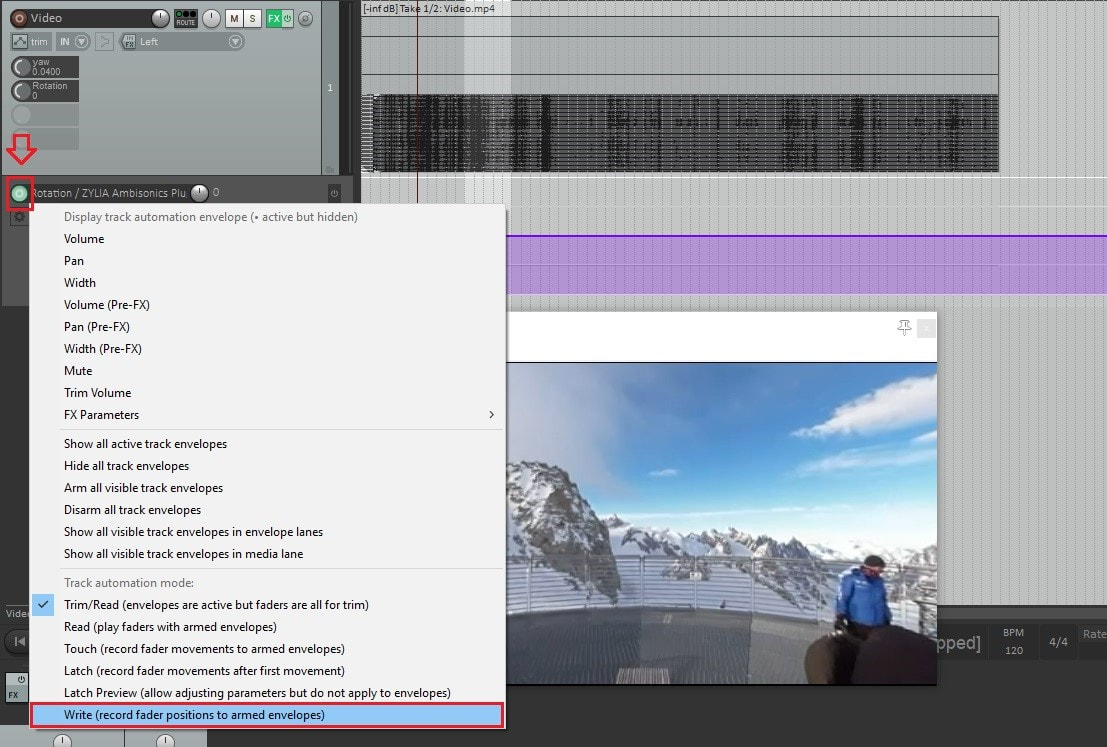 By pressing play you will record the automation of video and audio rotation in real time. Step 14 – Prepare for Rendering After writing the automation, change the envelope to Read mode instead of Write mode. 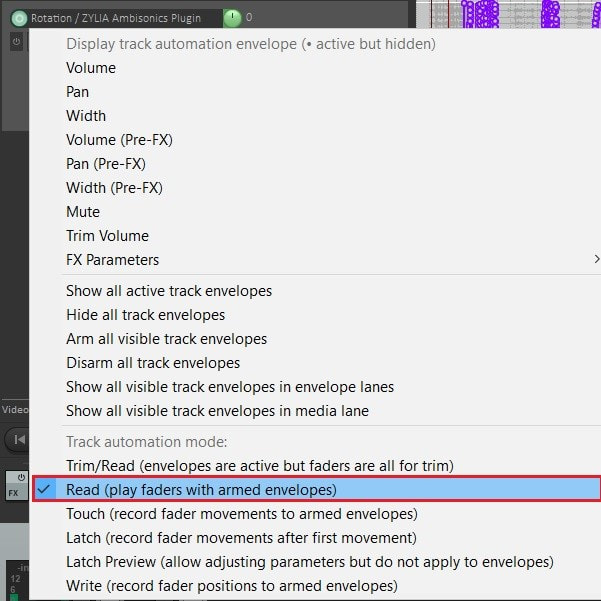 Disable the parameter modulation from the YAW control: Right click on Yaw and uncheck “Link from MIDI or FX parameter” 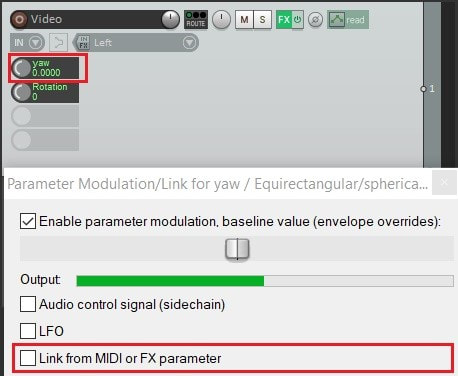 OPTIONAL: Replace your video file with the uncompressed version. If you have been working with a compressed video file, this is the time to replace it with the original media file. To do this, right click on the video track and select item properties. 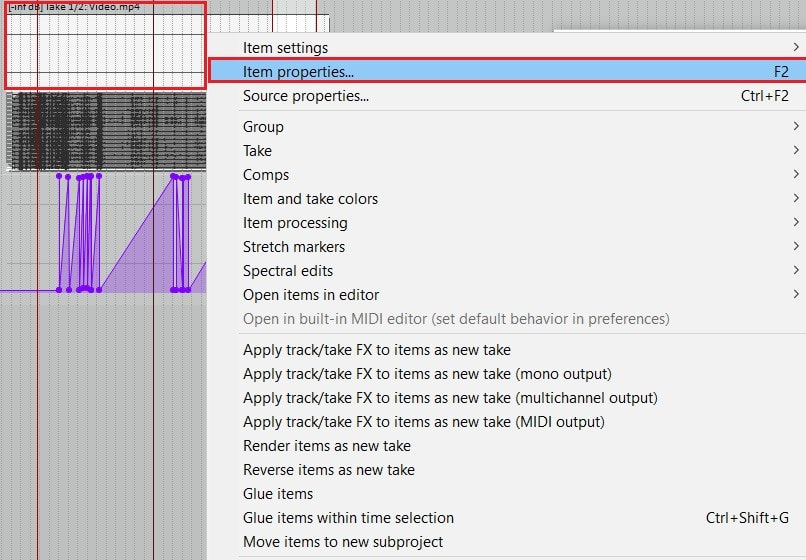 Scroll to the next page and click Choose new file. Then select your original uncompressed video file. 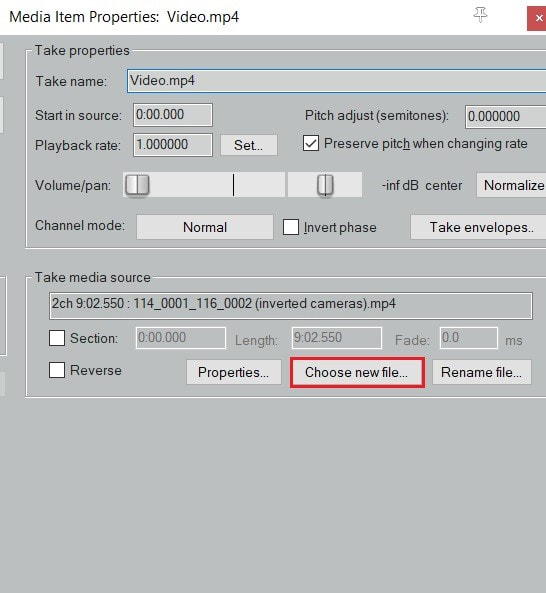 Step 15 – Render! You should now have your project ready for Rendering. Click on File – Render and set Channels to Stereo. On the Output format choose your preferred Video format. We exported our clip in .mov file with video codec H.264 and 24bit PCM for the Audio Codec. 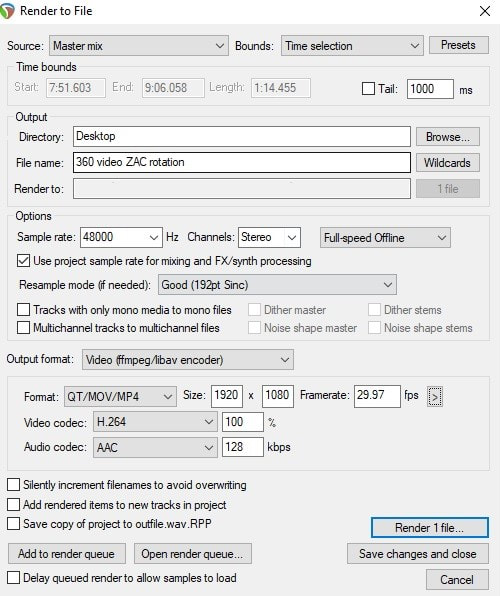 Thank you for reading and don’t hesitate to contact us with any feedback, questions or your results from following this guide.
0 Comments
|
Categories
All
Archives
August 2023
|
 RSS Feed
|
|
Connect with us |
|
© Zylia Sp. z o.o., copyright 2018. ALL RIGHTS RESERVED.
|