|
By Jakub Zamojski & Lukasz Januszkiewicz Recording and mixing surround sound becomes more and more popular. Among the popular multichannel representation of surround sound systems like 5.1, 7.1 or cinematic 22.2, especially worthy of note is an Ambisonics format, which is a full-sphere spatial audio technique allowing to get a real immersive experience of 3D sound. You can find more details about Ambisonics here (What is the Ambisonics format?). Our previous blog post “2nd order Ambisonics Demo VR” described the process of combining audio and the corresponding 360 video into fine 360 movie on Facebook. Presented approach assumes using of 8-channel TBE signal from ZYLIA Ambisonics Converter and converts audio into the Ambisonics domain. As a result we get a nice 3D sound image which is rotating and adapting together with the virtual movement of our position. However, it is still not possible to adjust parameters (gain, EQ correction, etc.) or change the relative position of the individual sound sources present in the recorded sound scene. In this tutorial we are going to introduce another approach of using ZYLIA ZM-1 to create a 3D sound recording, which gives much more flexibility in sound source manipulation. It allows us not only to adjust the position of instruments in recorded 3D space around ZYLIA microphone, but also to control the gain or to apply any additional effects (EQ, Comp, etc.). In this way we are able to create a fancy spatial mix using only one microphone instead of several spot mics!
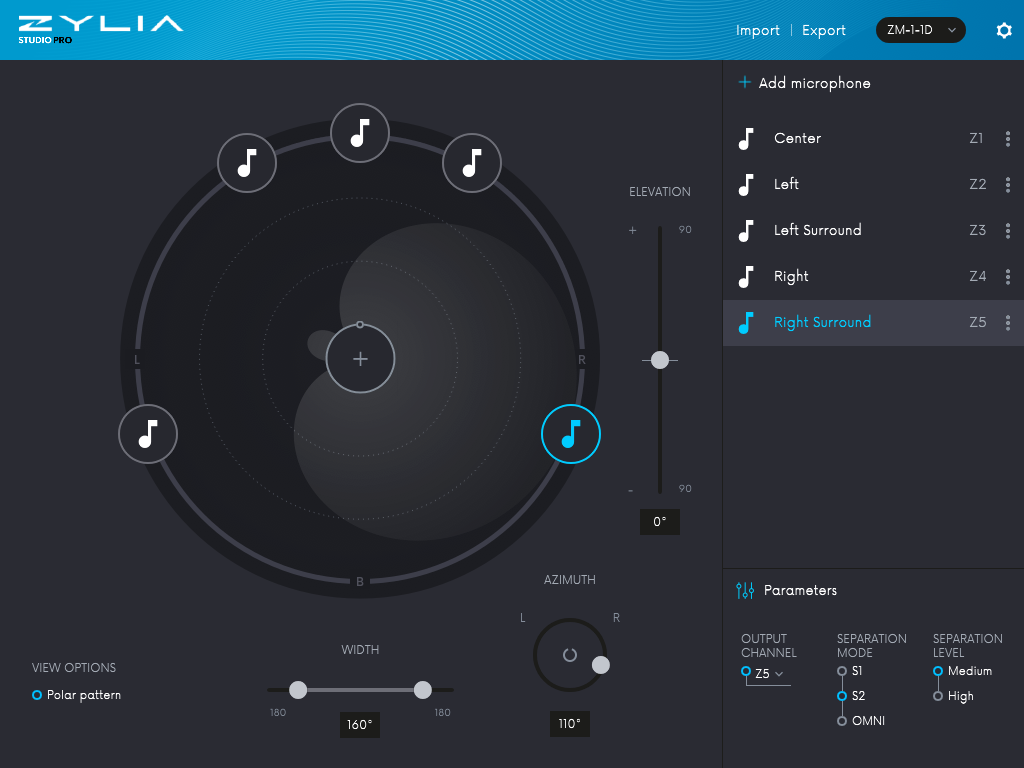
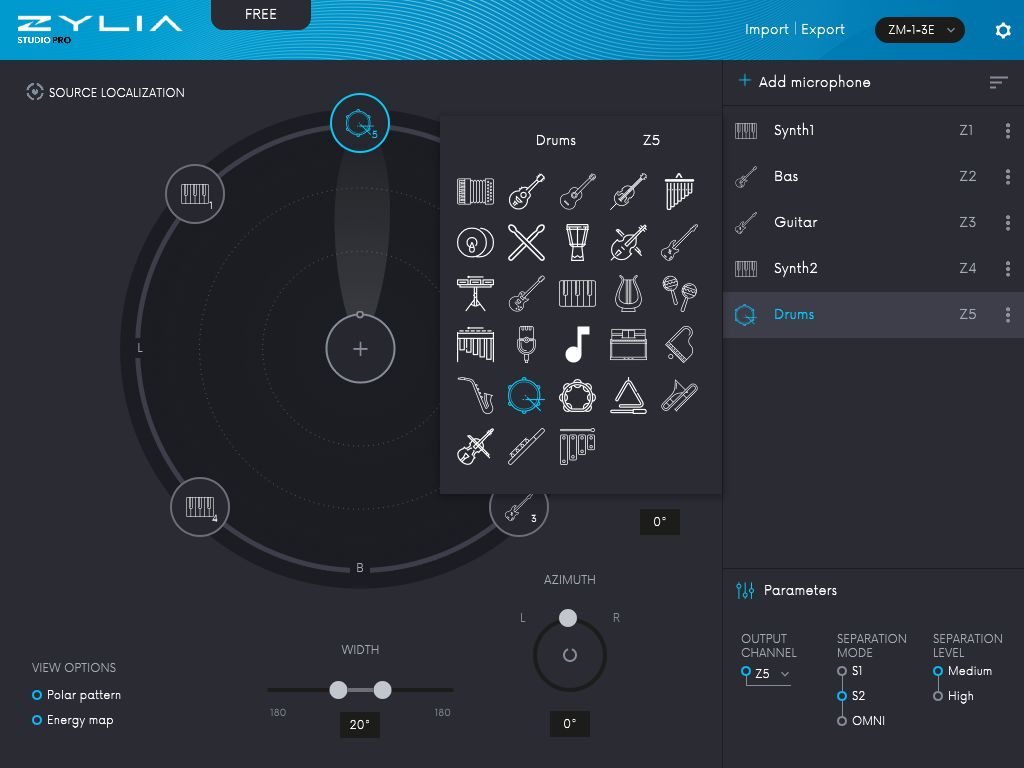
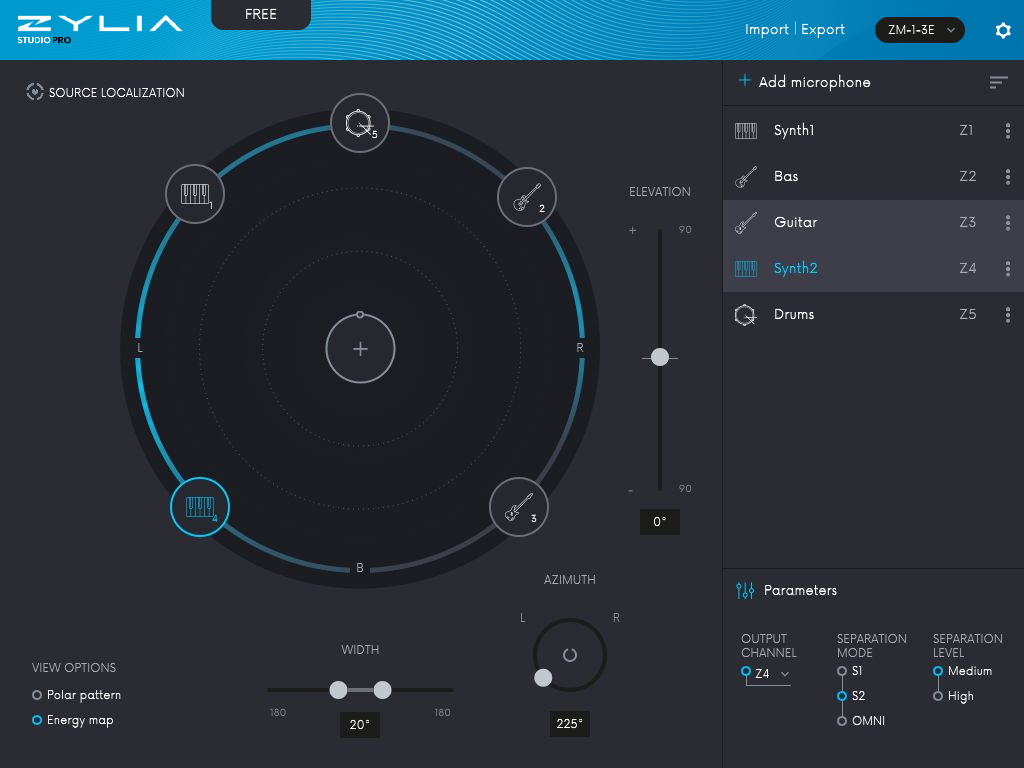
Spatial Encoding of Sound Sources – TutorialIn the end of July 2017, using ZYLIA ZM-1 microphone we have recorded a band called “Trelotechnika”. All band members were located around ZM-1 microphone, 4 musicians and one additional sound source – drums (played from a loudspeaker). During the post-production process, we applied ZYLIA Studio PRO VST plug-in (within Reaper DAW) on recorded 19-channel audio track. This allowed us to separate the previously recorded instruments and transfer them into the individual tracks in the DAW. Those tracks were then directed to the FB360 plug-ins, where encoding to the Ambisonics domain was performed. “Spatial Encoding of Sound Sources” - a step-by-step descriptionBelow, you will find a detailed description of how to run a demo session presenting our approach of recording and spatial encoding of sound sources. Demo works on Mac Os X and Windows. DOWNLOAD STAGE
TUTORIAL After opening the session, you will see several tracks:
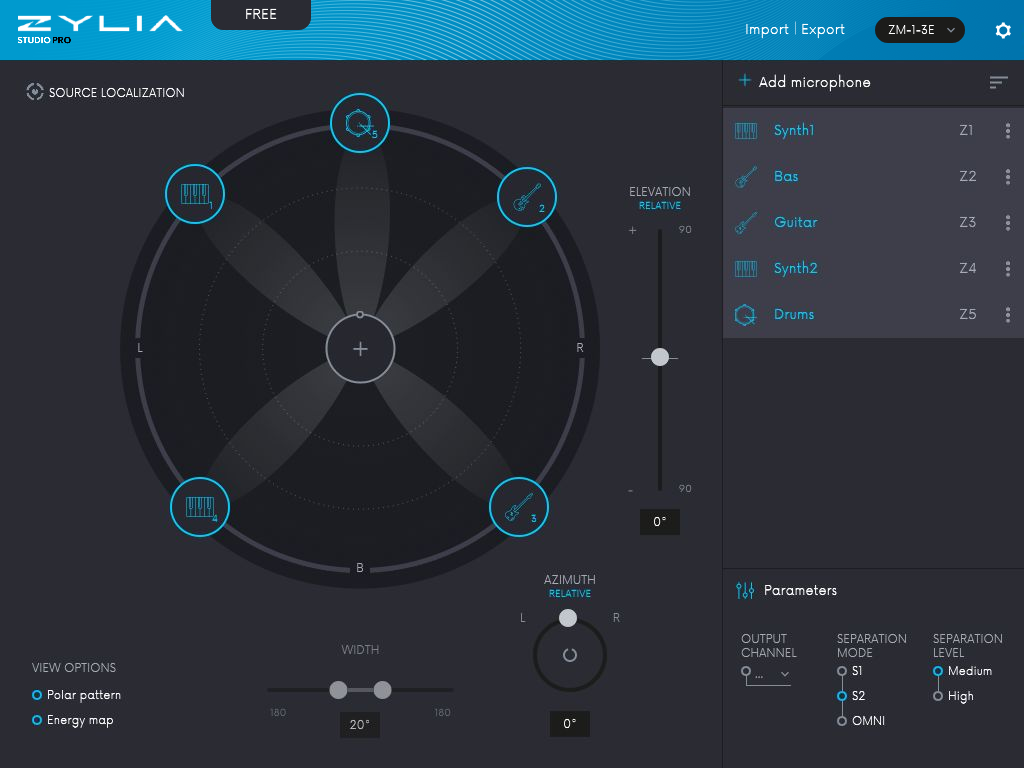 3. Separated signals from ZYLIA Studio PRO are passing to 5 individual tracks. You are able to adjust the gain, you can also mute or solo instruments, or you can apply some audio effects. A good practice is to use a high-pass filter for non-bass and low-pass for bass instruments to reduce a spill between them. We applied these filters to our session: 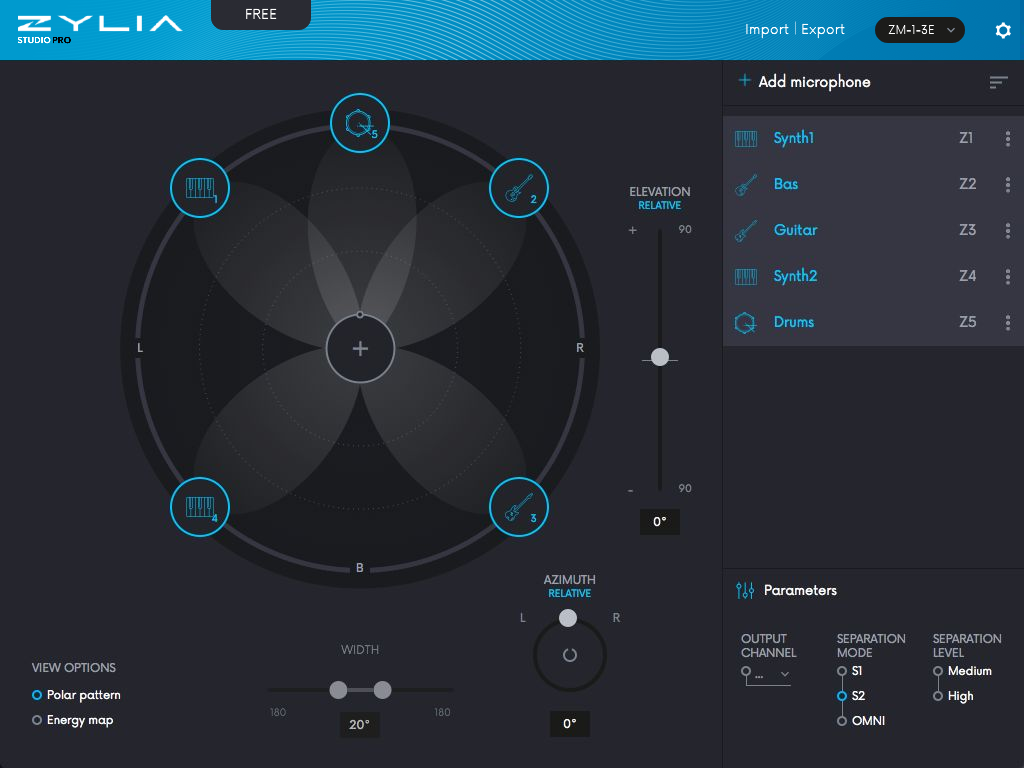 4. Spatialiser track – receives 5 signals from tracks with separated instruments. Spatialiser allows to distribute sound sources in desired positions in the 3D space. a) Click on FX and choose FB360 Spatialiser.
d) Back to Spatialiser view. You will see an equirectangular picture and five circles with numbers. Each circle represents a sound source position in the space. By default, sources are located in the positions corresponding to the real positions of the instruments in the picture, but it is possible to adjust it by clicking on the circle and dragging it around the picture. 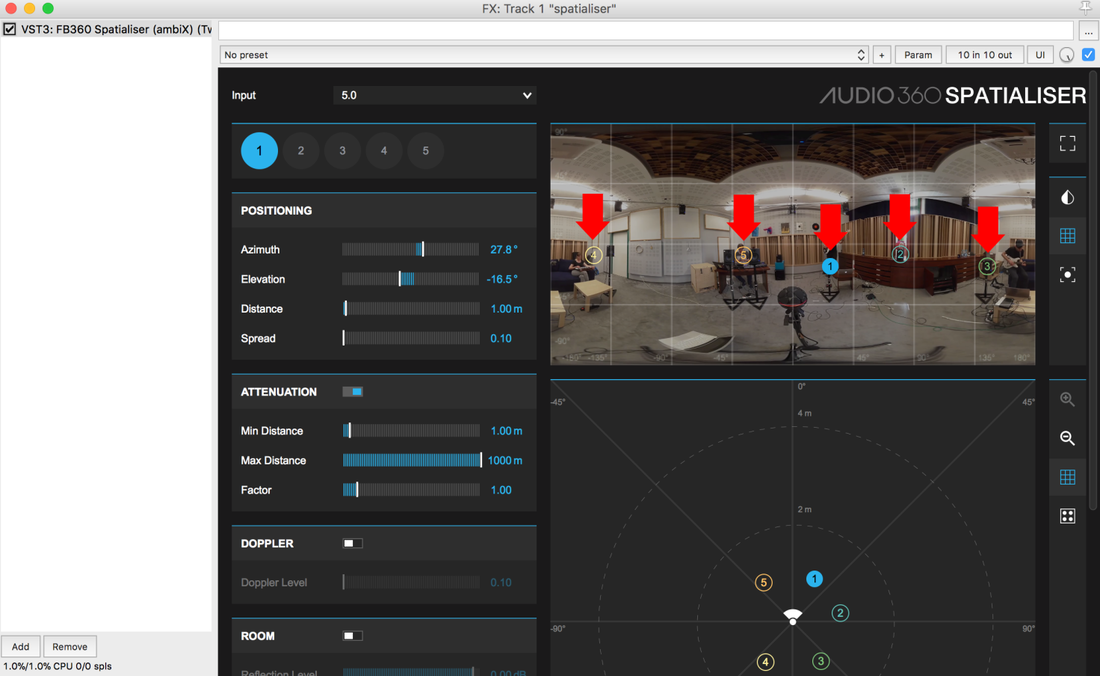
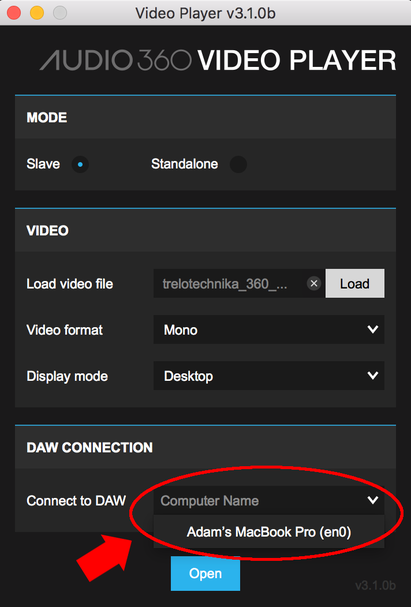
6. Now video is synchronized with audio. Adjusting the location of play-head in REAPER’s time line will affect the video’s time. Tap space bar to play audio and video. Rotation of the video in the player is tracked by the decoded and binauralized Ambisonics sound.
7. A good practice is to play video from the beginning of file to keep the synchronization. In some cases, it is necessary to close the VideoClient + VideoPlayer and load 360 video again to recover the synchronization. 8. Now you are able to rotate video across the pitch and yaw axis. Your demo is ready to run.
1 Comment
|
Categories
All
Archives
August 2023
|
 RSS Feed
|
|
Connect with us |
|
© Zylia Sp. z o.o., copyright 2018. ALL RIGHTS RESERVED.
|